Image Navigation and Annotation Tools
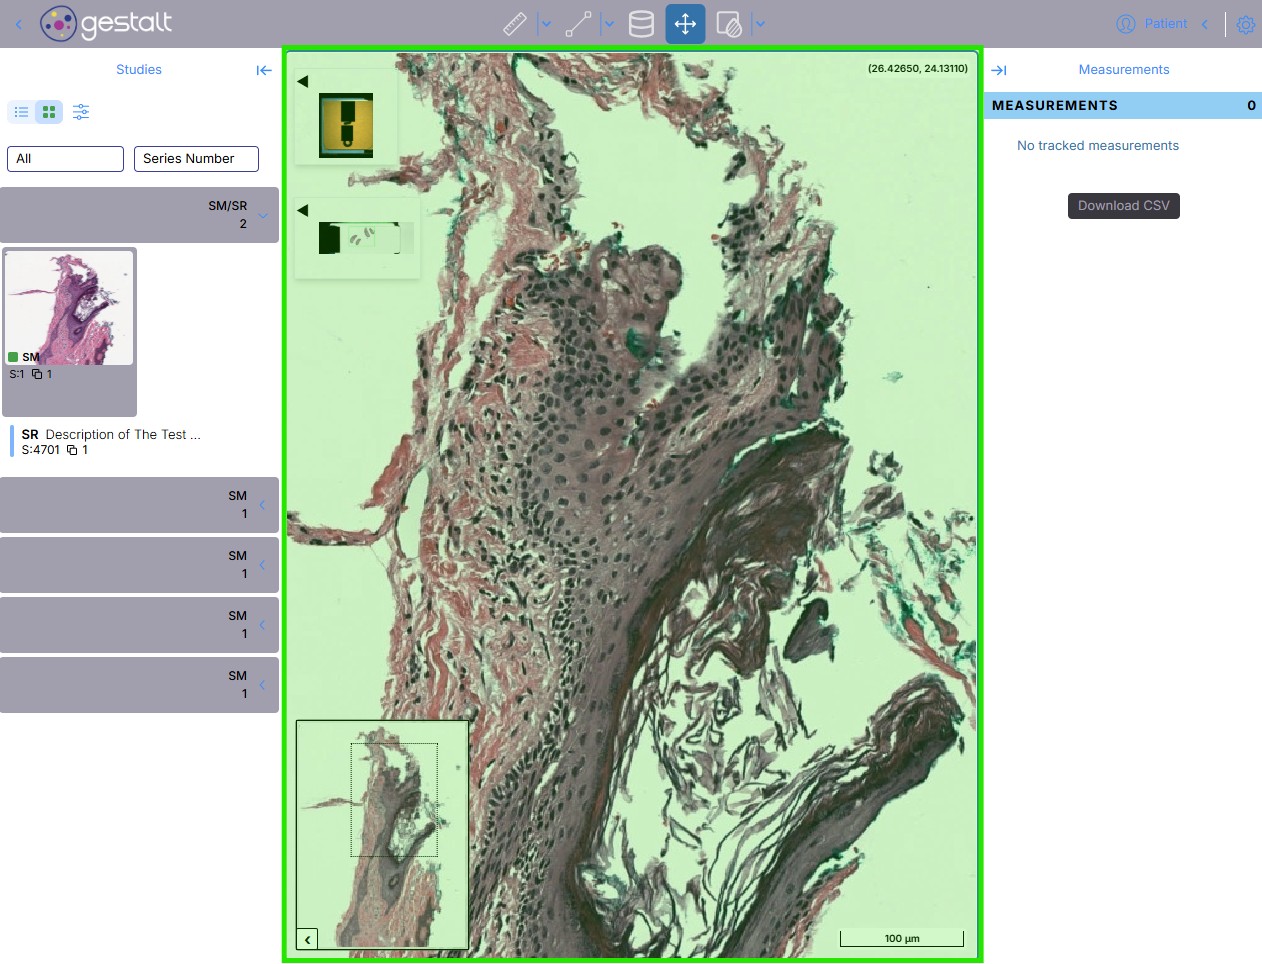
The PathCloud viewer includes options for creating and managing Regions of Interest (ROIs) for a whole slide image. This page will walk through the process of navigating the viewer pane, as well as how to create, modify, save, and delete ROIs.
Please make sure you have read and understood the PathCloud Viewer page before reading this tutorial, as it assumes some knowledge on the location and functionality of the Case Information, WSI Viewer, and Image Information panes.
Image Navigation
Make sure the "Move" button in the Annotation Toolbar is selected as shown in the below image before following the steps to move and navigate through an image.
-
Move your cursor over the WSI Viewer pane and scroll up/down to zoom in/out. Note that the WSI scale on the bottom right side of the image will dynamically resize and change to accurately represent the scale of the image you are viewing.
-
Click and drag within the viewer pane to pan around the image, or use the Point of View box within the Image Preview pane to quickly relocate to different sections of the image.
Annotation Tools
Within PathCloud Viewer, annotations can be easily created, modified, and deleted to highlight and mark critical parts of an image for sharing and analysis. Please follow the below step-by-step guides to create, modify, and delete annotations.
Draw ROI
Steps:- Click the down arrow next to the Measure Tools button to drop down a list of different ROI creation options and select a tool.
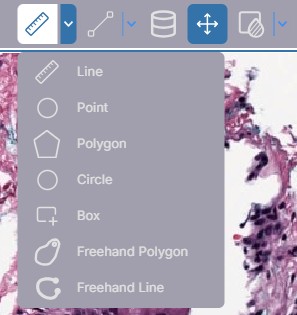
Freehand tools employ a click and drag method for drawing an ROI, make sure that when using a freehand tool you continue holding down the cursor until you finish drawing the ROI.
-
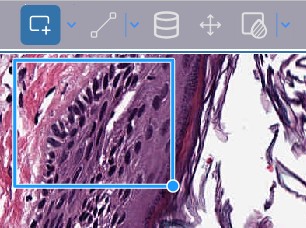
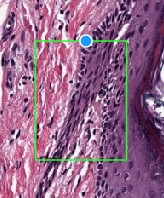
Click the image with the tool equipped to start creating an ROI.
-
Move the cursor to another section of the image, and click again to finalize the shape of the ROI. In this example, a box shape was used for the annotation shape.
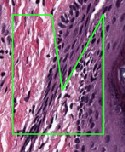
The Polygon measurement tool differs in that each click creates another edge of the polygon. To finish a shape, bring the cursor over to one of the previously established edges of the ROI, and click once to connect the sides together.
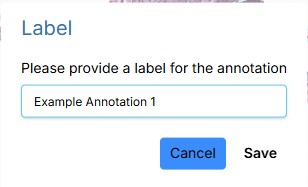
- Provide a label for the ROI and click "Save" to save the annotation to the Measurements Pane.
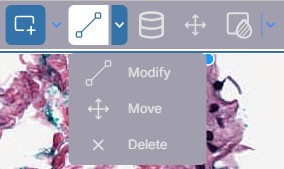
Modify ROI
-
Click the "Modify" option from the "More Modification Tools" dropdown menu.
-
Move your cursor to an edge of an existing ROI.
-
Click and hold the edge of the ROI to modify the shape of the edge.
-
Release the mouse cursor and the ROI will be updated with the new shape.
Move ROI
Steps:-
Click the "Move" option from the "More Modification Tools" dropdown menu.
-
Move your cursor to an edge of an existing ROI.
-
Click and hold the edge of the ROI to move it to the desired position.
Delete ROI
Steps:-
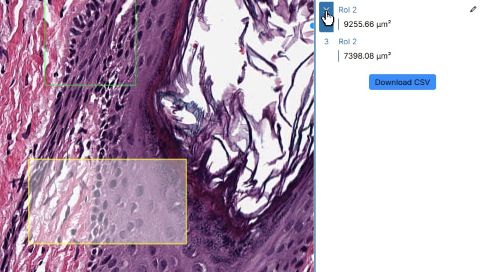
Click the ROI you wish to remove from the Measurements Pane on the right-hand side.
-
Click the "Delete" option from the "More Modification Tools" dropdown menu.
You can also delete the ROI from the Measurements Pane by hovering over the measurement number on the ROI as seen in the below image.
Saving Annotations
Steps:-
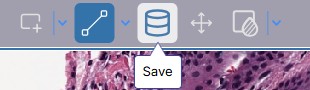
Click the save button from the Annotation Toolbar.
-
Input a series description for the imaging study and click save.
-
The Annotations will now be saved as a separate instance which can be opened from the Studies Pane.
Apply ICC Profile
Steps:-
Click the "Apply ICC Profile" button on the right side of the annotation toolbar to activate the ICC profile for the given image.
-
Click the Apply ICC Profile again to deactivate the profile for the image.