Share, Modify, or Delete an Image
Individual image records can be shared with others, modified, or deleted as needed by the user or organization that originally uploaded them.
Before you Begin
Make sure that your account has sufficient permissions to modify an image, which is indicated by the presence of an edit button next to a study. In the below example, the user only has permission to modify the Susan Gestalt study.

Share Image to Public
Steps:-
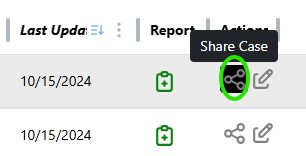
Click the "Share Case" button from the Actions category on the record you wish to share.
-
Click the "Share Image" button from the pop-up window.
-
Await completion of the image share process. You will see a loading icon replacing the "Share Case" button in the Actions Column. If nothing appears to be updating, try refreshing the table to fetch the latest state.

-
When complete, the Image's Public Visibility column will update and the "Share Case" button will turn green.

-
Open the newly shared image within a public worklist to view the anonymized image.
Manage Image Share
Once a user shares an image, they have the ability to change and modify some of the options and functionalities of the shared image. Currently, there are three options a user has for a shared image: Worklist and Link, Link Only, and Remove Share.

-
Worklist and Link
The default setting for a shared public image. If an image is shared to worklist and link, it will appear in all public worklists and be visible by anyone. -
Link Only
Change the visibility of the public image to be accessible from a public link. This keeps an image hidden from view within the "Public" worklist unless the user has a specific URL that study, or if the public link study exists in a public folder. The user may convert the image back to a normal public share by clicking the "Worklist and Link" menu option. -
Remove Share
This allows the user to remove the publicly shared image and revert it back to a private image. This will remove the anonymized image and delete the image from any public folders it belongs in. This accomplishes the same outcome as deleting a public version of an image via the "Edit" button.
Share Image via Email
Make sure the image is already shared to the public archive before proceeding, as only publicly shared images can be emailed.
-
Click the "Share Case" button from the Actions category on the record you wish to share.
-
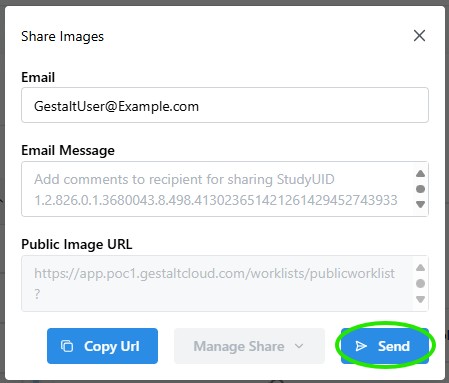
Input an email recipient within the "Share Images" pop-up window.
-
Add any optional comments to the "Email Message" field.
-
Click the send button to open your device's email program and display the drafted email.
-
Send the email from your device's email program.
-
Click the 'X' button on the top right of the pop-up window to close the "Share Images" window.
Modify an Image
Steps:-
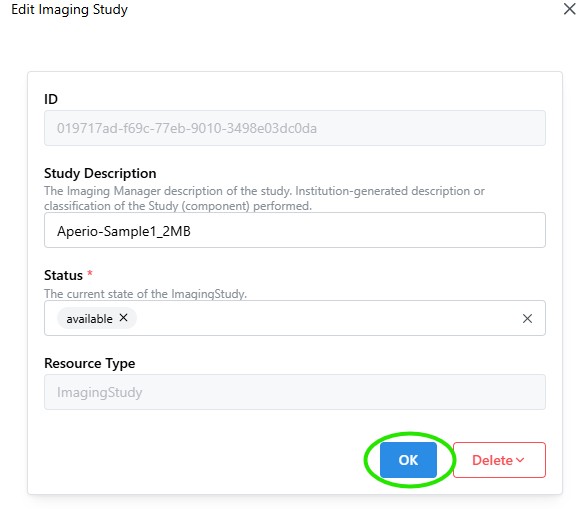
Click the "Edit" button from the Actions category to open the "Edit Imaging Study" pop-up window.

-
Modify the available fields as needed.
-
Click "OK" once satisfied with the modifications to save the changes.
Delete an Image
Steps:-
Click the "Edit" button from the Actions category to open the "Edit Imaging Study" pop-up window.
-
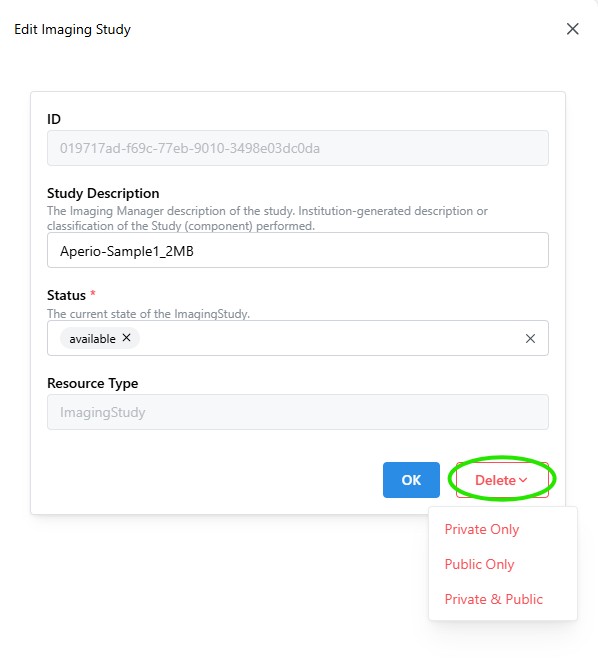
Click the delete button from the "Edit Imaging Study" pop-up window to drop down with a list of deletion options.
-
Select which version of the image should be deleted: Private, Public, or Private & Public (full delete).
-
Read and confirm the action to proceed with image deletion.
Removing the private version of an image will make it impossible to reclaim a non-anonymized version of the study from PathCloud.
- Wait for the deletion process to conclude, the edit menu will then auto-close.